Virtual Classroom API & Online Whiteboard API
Deliver Live Engaging Classes from your application or website through Most Powerful Virtual Classroom and Online Whiteboard API
Get a DemoVirtual Classroom API can support any workflow of online teaching
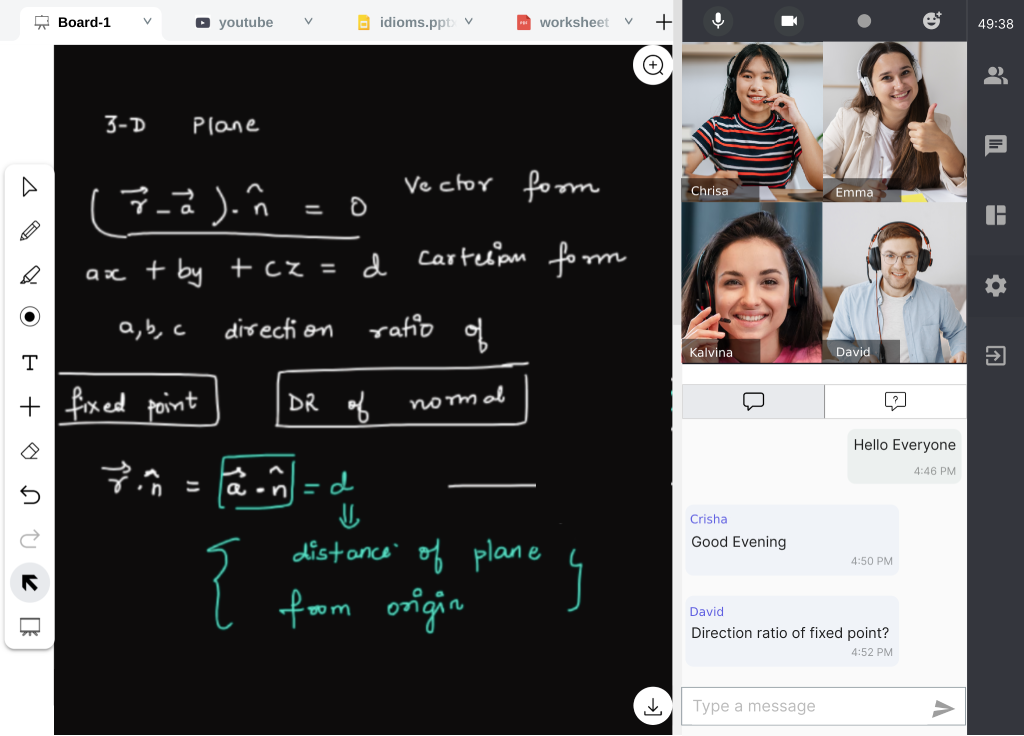
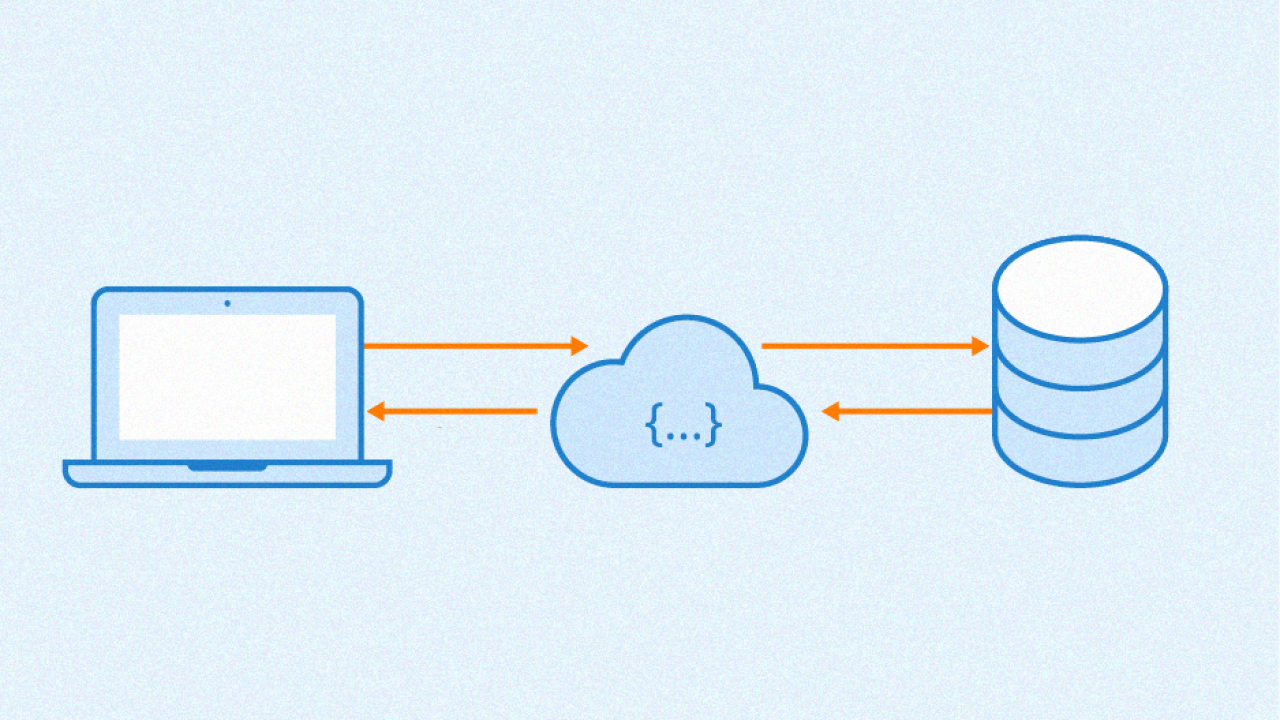
Virtual Classroom API enables you to schedule live classes from your website, open a virtual classroom in your App or website, and show recording, attendance, and other reports on your platform. You get live automated pings when the session goes live and it ends. Through API, you can open content, whiteboard, and videos in live classrooms. It supports all possible workflows in online teaching and learning.

Innovate according to your business
-
Create a tutoring website, tutoring marketplace, online courses portal using Classroom API.
-
Add a live teaching module to LMS or CMS like moodle or WordPress.
-
Use SSO to make your users access all features of MeritHub
-
Create a full fledged Mooc/Courses delivery platform using MeritHub's Virtual Classroom API and Online Whiteboard API.
Fully managed, leave servers & infrastructure to MeritHub
-
No need to download or install software, or setup new servers. You just interact with our REST-based Virtual Classroom API and Online Whiteboard API through your favourite programming language and we will take care of everything.


Fully featured, Reliable & highly scalable
-
You get the most advanced virtual classroom in a few easy integration steps. We manage all the infrastructure and load of peak hours for you. You get all the tools in virtual classroom including:
-
Audio/Video communication, chat, screen sharing, content sharing, whiteboard, class management tools, session recording and attendance.
Get everything you need to manage online classes
-
Schedule one time or perma live classes with API
-
Get common host, moderator and participant link to join the class
-
Set and edit classes schedule
-
Edit, delete and cancel classes
-
Add participants and get unique link for each participant
-
Get attendance report for each class
Drive API to manage content for the classroom
-
Pre-upload content in the library (drive) and share it with learners in the classroom.
-
Even students can upload content in the library with the API.
-
Upload content in the public library and make it accessible to all people in the organization.
Seamless integration
-
You learners and instructors, directly enter the MeritHub classroom and go back to your portal when class is over. No hick-ups in-between.
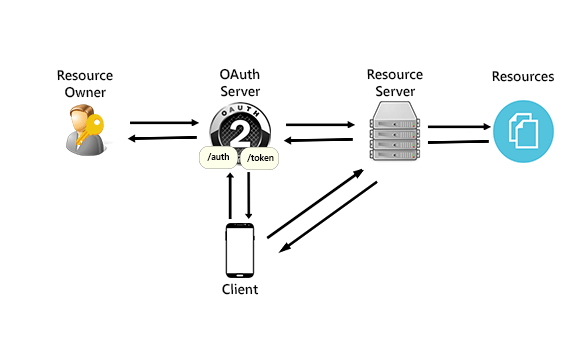
Secure Oauth2 authentication
-
We follow Oauth2 to grant API token and expire it after 60 mins to keep it highly secure.This ensures highly secure communication with virtual classroom, online whiteboard and our scheduling system.
JSON based communication
-
Developers can integrate our REST-based Virtual Classroom and Online Whiteboard API in any of their favourite programming languages. A few examples are python, Node.JS, PHP, GoLang, Java, C#.Net, swift, Ruby. Our tech team will guide your development team on each step.
MeritHub Virtual Classroom and Whiteboard work best in WebView in Andriod Apps and iOS Apps. Android SDK, iOS SDK, or any other interactive whiteboard SDK is not required to use MeritHub in Apps. It works on all devices.
To get API keys and documentation
Get Started With Live Classes API
To get started using the Classroom API you first need to get Client ID and Client Secret.
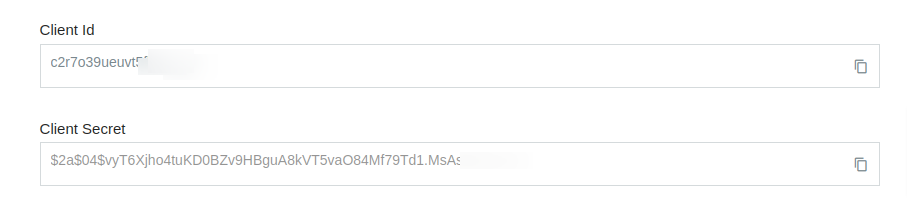
Please find the steps below to get Client Id and Client Secret:
- Log in to your Organization Account and click on Admin Console.
- Then click on API and fill in the relevant information.
- If that section is not available to you, please contact sales@merithub.com or message on WhatsApp at +91 98151 74050.
We provide you with development support for API integration. We connect your development team with our development team. If your developer has any confusion, we are there to assist them.
Main API Endpoints
MeritHub API Integration can be completed in these steps:
-
Getting MeritHub Access token
https://serviceaccount1.meritgraph.com/v1/:clientId/api/token -
Adding users and getting MeritHub user Id
https://serviceaccount1.meritgraph.com/v1/:clientId/users -
Scheduling class for the teacher
https://class1.meritgraph.com/v1/:clientId/:userId -
Adding the students in the class and getting their url.
https://class1.meritgraph.com/v1/:clientId/:classId/users -
Webhook for attendance, recording and other data like class status, files used in the classroom etc.
Generate JWT
After Getting Client Id and Client Secret, the next step is to generate JWT (JSON Web Token).
You can generate JWT in any language and integrate our API in any server-side language. We are providing
a sample code here. If you need the same in any other language, please contact
Note: Please replace {CLIENT_ID} and {CLIENT_SECRET} in the sample code with your MeritHub Client Id and Client Secret.
        function base64url_encode($str) {
            return rtrim(strtr(base64_encode($str), '+/', '-_'), '=');
        }

        function generate_jwt($headers, $payload, $secret = 'CLIENT_SECRET') {
            $headers_encoded = base64url_encode(json_encode($headers));

            $payload_encoded = base64url_encode(json_encode($payload));

            $signature = hash_hmac('SHA256', "$headers_encoded.$payload_encoded", $secret, true);
            $signature_encoded = base64url_encode($signature);

            $jwt = "$headers_encoded.$payload_encoded.$signature_encoded";

            return $jwt;
        }

        $headers = array('alg'=>'HS256','typ'=>'JWT');
        $payload = array('aud'=>'https://serviceaccount1.meritgraph.com/v1/’CLIENT_ID’/api/token', 'iss'=>'CLIENT_ID', 'expiry'=> 3600);

        $jwt = generate_jwt($headers, $payload);

        echo $jwt;
        const jwt = require('jsonwebtoken');
        const fetch = require('node-fetch');


        async function getJwt(){
            const payload = JSON.stringify({
                iss: '{CLIENT_ID}',
                aud: 'https://serviceaccount1.meritgraph.com/v1/{CLIENT_ID}/api/token',
                expiry: 3600
            })
            const merithubJwt = jwt.sign(payload, '{CLIENT_SECRET}')

            console.warn("merithub jwt token= == > ", merithubJwt)

        }


        getJwt();
        import jwt
        import requests

        header = {
            "alg": "HS256",
            "typ": "JWT"
        }


        payload ={
            "aud":"https://serviceaccount1.meritgraph.com/v1/{CLIENT-ID}/api/token",
            "iss":"{CLIENT-ID}",
            "expiry":3600
        }

        encoded = jwt.encode(payload, '{CLIENT-SECRET}', algorithm='HS256')
        jwtToken=str(encoded,'utf-8')
        using System;
        using System.Text;
        using Microsoft.IdentityModel.Tokens;
        using Newtonsoft.Json;
        using System.Security.Cryptography;

        namespace ConsoleApp6
        {
            class Program
            {
                static void Main(string[] args)
                {
                    var header = new
                    {
                        alg = "HS256",
                        typ = "JWT"
                    };

                    var headerPart = Base64UrlEncoder.Encode(JsonConvert.SerializeObject(header));

                    var payload = new
                    {
                        aud = "https://serviceaccount1.meritgraph.com/v1/{CLIENT_ID}/api/token",
                        iss = "{CLIENT_ID}",
                        expiry = 3600

                    };

                    var payloadPart = Base64UrlEncoder.Encode(JsonConvert.SerializeObject(payload));

                    var secret = "{CLIENT_SECRET}";
                    var sha256 = new HMACSHA256(Encoding.UTF8.GetBytes(secret));
                    var hashBytes = sha256.ComputeHash(Encoding.UTF8.GetBytes($"{headerPart}.{payloadPart}"));
                    var hash = Base64UrlEncoder.Encode(hashBytes);

                    var jwt = $"{headerPart}.{payloadPart}.{hash}";

                    Console.WriteLine(jwt);

                    Console.ReadKey();

                }


            }
        }
Get access token
MeritHub uses OAuth 2.0 authentication which is the industry-standard protocol for authorization
The MeritHub API Access token will be used to authenticate each requests that your app makes to MeritHub API Endpoints. As Access tokens are short lived, so you can get new access token when the current access token expires. MeritHub API Access token expires in 60 minutes.
Note: Please save this Access Token in your database or config file and implement the cron job to renew it after 55 minutes or so, or you can renew it when you get an unauthorized error. Do not send token request on every page/screen load as you can make maximum 10 token generation calls per hour.
You can explore more about this standard at:
https://developers.google.com/identity/protocols/oauth2/service-account
        HTTP Method: POST
        Endpoint: https://serviceaccount1.meritgraph.com/v1/{CLIENT_ID}/api/token
        Content Type: application/x-www-form-urlencoded

        Request Body:
        {
            "assertion":"Bearer {JWT_TOKEN}"
            "grant_type":"urn:ietf:params:oauth:grant-type:jwt-bearer"
        }
        {
            "access_token": "ACCESS_TOKEN",
            "expires_in": “EXPIRY”,
            "api_domain": "https://serviceaccount1.meritgraph.com/{CLIENT_ID}/api/token",
            "token_type": “Bearer”
        }
        $request = new HttpRequest();
        $request->setUrl('https://serviceaccount1.meritgraph.com/v1/{CLIENT_ID}/api/token');
        $request->setMethod(HTTP_METH_POST);

        $request->setHeaders(array(
            'content-type' => 'application/x-www-form-urlencoded'
        ));

        $request->setContentType('application/x-www-form-urlencoded');
        $request->setPostFields(array(
            'assertion' => 'Bearer  {PUT YOUR JWT TOKEN HERE WITHOUT BRACES}',
            'grant_type' => 'urn:ietf:params:oauth:grant-type:jwt-bearer'
        ));

        try {
            $response = $request->send();

            echo $response->getBody();
        } catch (HttpException $ex) {
            echo $ex;
        }
        var myHeaders = new fetch.Headers();
        myHeaders.append("Content-Type", "application/x-www-form-urlencoded");
        var urlencoded = new URLSearchParams();

        urlencoded.append('grant_type','urn:ietf:params:oauth:grant-type:jwt-bearer')
        urlencoded.append('assertion','Bearer '+{JWT_TOKEN})

        var requestOptions = {
            method: 'POST',
            headers: myHeaders,
            body:urlencoded
        };

        fetch("https://serviceaccount1.meritgraph.com/v1/{CLIENT_ID}/api/token", requestOptions)
            .then(response => response.text())
            .then(result => console.warn(result))
            .catch(error => console.log('error', error));
        url = 'https://serviceaccount1.meritgraph.com/v1/{CLIENT_ID}/api/token'
        tokenRequestBody = {
            'assertion': 'Bearer '+{JWT_TOKEN},
            'grant_type':'urn:ietf:params:oauth:grant-type:jwt-bearer'
        }

        accountResponse = requests.post(url, data = tokenRequestBody)
        print(accountResponse.text)
        var client = new RestClient("https://serviceaccount1.meritgraph.com/v1/{CLIENT_ID}/api/token");
        client.Timeout = -1;
        var request = new RestRequest(Method.POST);
        request.AddHeader("Content-Type", "application/x-www-form-urlencoded");
        request.AddParameter("assertion", "Bearer "+{JWT_TOKEN});
        request.AddParameter("grant_type", "urn:ietf:params:oauth:grant-type:jwt-bearer");
        IRestResponse response = client.Execute(request);
        Console.WriteLine(response.Content);
Add users to account
After getting MeritHub API Access Token, You need to add users to your MeritHub Organization Account. You will send us user information as shown in the sample request and we will provide you a unique MeritHub User Id for each user.
MeritHub doesn't allow you to get user information from MeritHub API Endpoint.Thats why you need to save MeritHub User Id into your database corresponding to your user.
Note: Please ignore the user token in Response. Do not use that token in any request.
- emailId and clientUserId should be unique. If you don't want to send emailId, please send the dummy unique emailId.
- If you don't have user images, in imageUrl, you can send any static image url.
Roles
- 'C' for Creator or Teacher
- 'M' for Students
Permissions:
- 'CC' for Course and Classes Creation/Edit Permissions
- 'CJ' for Course and Class Joining Permissions
            HTTP Method: POST
            Endpoint: https://serviceaccount1.meritgraph.com/v1/{CLIENT_ID}/users
            Content Type: application/json
            Header: "Authorization": Bearer {AccessToken}

            Request Body:
            {
                "name" : "name 1",
                "title" : "software engineer",
                "img" : "https://hst.meritgraph.com/theme/img/png/avtr.png",
                "desc" : "this id demo user",
                "lang" : "en",
                "clientUserId" : "1234-ABCD”,
                "email" : "email@xyz.abc",
                "role" : "M",
                "timeZone" : "Asia/Kolkata",
                "permission" : "CJ"
            }
            {
                "userId": "merithub_userId_of_the_added_user",
                "userToken": “Bearer xxxxxxxxxxxxxxxxxxxxxxxxxxxxxxxxxxxx”
            }
Update user in account
You can update the user information at any time.
            HTTP Method: PUT
            Endpoint: https://serviceaccount1.meritgraph.com/v1/{CLIENT_ID}/users/{USER_ID}
            Content Type: application/json
            Header: "Authorization": Bearer {AccessToken}

            Request Body:
            {
                "name" : "name 1",
                "title" : "software engineer",
                "img" : "https://hst.meritgraph.com/theme/img/png/avtr.png",
                "desc" : "this id demo user",
                "lang" : "en",
                "email" : "email@xyz.abc",
                "role" : "M",
                "timeZone" : "Asia/Kolkata",
                "permission" : "CJ"
            }
            {
                "userId" : "userId",
                "CLIENT_ID" : "CLIENT_ID",
                "name":”name”,
                "title" :”title”,
                "img" : "img url",
                "description" : "description",
                "lang" : "en",
                "email" : "email1@xyz.com",
                "role" : “M”,
                “timeZone" :”Asia/Kolkata”,
                "permission" : “CJ”,
                "clientUserId" :”123123”,
            }
Delete user in account
This will remove or delete the user from your account. You need to send the UserId of that user in the endpoint whom you want to delete.
This is irreversible process. Once you delete the user from your account, You can not recover it.
Schedule a class
Next step is to schedule a class. You can schedule two types of classes. OneTime class. and Perma class.
title (string)
You can give any name to your class. It cannot be emptystartTime (string)
Start time must be in rfc3339 format. You can explore this standard at:https://www.rfc-editor.org/rfc/rfc3339
endDate (string)
This parameter tells on what date the perma series will be completed. (Not Required for OneTime session)recordingDownload (bool)
This parameter tells if you want to allow participants to download the class recording or not.duration (int)
Duration of the class is in minutes. It is an integer input.timeZoneId (string)
This is the timezone in which you want to schedule the class.description (string)
Any brief summary about the class. You can ignore it if you dont have any description.type (string)
- oneTime: oneTime class requires new class link to start every new session of online live class. Once the class ends, the same link can not be used for new class.
- perma: perma class is scheduled only once and can be used as many as times you want to use.link never expires. you will use the same link for each time. In perma class, further you can have two choices. Either you can create perma class with No Schedule or You can create perma class with Schedule.
- For No Schedule means, you will not send 'schedule' parameter in request. you can make this class live at any time.
- For Schedule means, you have to provide the sequence of numbers in 'schedule' parameter in the request. Like 0 for Sunday , 1 for Monday , 2 for Tuesday and so on. Unlike without schedule, this class can be made live only at specific time.
login (bool)
This parameters describes whether the class requires a signup or not.layout (string)
- CR for classroom view
- GL for galley/meeting view
- WB for full whiteboard view
- SS for split screen view
status (string)
- up for upcoming class
- lv for live class
- cp for completed class
- ex for expired class
- dl for deleted class
schedule ([]int)
This parameter tells on which days,the class will be repeated. (Not Required for OneTime session)you have to provide the sequence of numbers in 'schedule' parameter in the request. Like 0 for Sunday , 1 for Monday , 2 for Tuesday and so on.
totalClasses (int)
This parameter tells after how many occurrences the perma series will be completed. (Not Required for OneTime session)
You will get classId, commonLinks and unique hostLink in response.
Do not use commonLinks to open the classroom. commonLinks are used to add users to scheduled class or
these are used by guest users.
You would want to use hostLink to open the class:
https://live.merithub.com/info/room/{CLIENT_ID}/{hostLink}
If you want to show device test page, You may put additional query string like:
https://live.merithub.com/info/room/{CLIENT_ID}/{hostLink}?devicetest=true
Note: You can set either of "endDate" or "totalClasses" for perma class. we do not consider either of them for one time class. Both parameters tell when the perma series will be marked as completed. So you can set any one of them.
            HTTP Method: POST
            Endpoint: https://class1.meritgraph.com/v1/{CLIENT_ID}/{INSTRUCTOR_ID}
            Content Type: application/json
            Header: "Authorization": Bearer {AccessToken}

            Request Body:
            {
                "title": "Testing This Class",
                "startTime": "2020-10-05T15:29:00+05:30",
                "endDate": "2020-10-05T15:29:00+05:30" // For perma class,
                "recordingDownload": false,
                "duration": 60,
                "lang": "en",
                "timeZoneId": "Asia/Kolkata",
                "description": "This is  a Test Class",
                "type": "oneTime",
                "access": "private",
                "login": false,
                "layout": "CR",
                "status": "up",
                "recording": {
                    "record": true,
                    "autoRecord": false,
                    "recordingControl": true
                },
                "participantControl" : {
                    "write": false,
                    "audio": false,
                    "video": false
                },
                "schedule":  [2, 4, 5],
                "totalClasses": 20,
		        "avMode": "",
                "whiteboard" : {
                    "asyncMode": false
                }
	}
            {
                "classId" :  "Scheduled_Class_ID",
                "commonLinks" : {
                    "commonHostLink" : "Common__Host__Link__To__Join"
                    "commonModeratorLink": "Common__Moderator__Link__To__Join"
                    "commonParticipantLink": "Common__Participant__Link__To__Join"
                },
                "hostLink": "Unique__User__Link__For ___User_"
            }
You would want to use hostLink to open the class: https://live.merithub.com/info/room/{CLIENT_ID}/{hostLink} If you want to show device test page, You may put additional query string like: https://live.merithub.com/info/room/{CLIENT_ID}/{hostLink}?devicetest=true
Edit class
You can edit any class info except "Type" of the class.
You cannot change the "type" of class.You can edit the "schedule"only in case of perma class.
            HTTP Method: PUT
            Endpoint: https://class1.meritgraph.com/v1/{CLIENT_ID}/{CLASS_ID}
            Content Type: application/json
            Header: "Authorization": Bearer {AccessToken}

            Request Body:
            {
                "title" : "Testing This Class",
                "startTime" : "2020-10-05T15:29:00+05:30",
                "endDate" : "2020-10-05T15:29:00+05:30",

                "recordingDownload": false,
                "duration" : 30,
                "lang" : "en",

                "timeZoneId" : "Asia/Kolkata",
                "description" : "This is Test Class",
                "login" : false,
                "layout" : "CR",
                "recording" : {
                    "record" : true,
                    "autoRecord": false,
                    "recordingControl": true
                },
                "participantControl" : {
                    "write" : false,
                    "audio" : false,
                    "video" : false
                },
                "schedule"  :  [2, 4, 5]
            }
            {
                "message":"success"
            }
Add user in class
You can add more users to the class with different roles.
userId
This is the MeritHub UserId that you have already saved into your database when you added that user into your MeritHub Account.userLink
This is one of the common links returned by 'Schedule a Class' endpoint.If you want to add the user with student role, then please use commonParticipantLink as userlink.
If you want to add the user with teacher role, then please use commonHostLink as userlink.
userType
User type for all API users is 'su' stands for Service User
You will get unique userLink for each user in response. You can open the classroom for each user by using their user specific link.
Please do not user commonLinks. commonLinks are for guest users but you are service user.
You would want to open the class for user:
https://live.merithub.com/info/room/{CLIENT_ID}/{userLink_from_Response}
https://live.merithub.com/info/room/{CLIENT_ID}/{userLink_from_Response}?devicetest=true
            HTTP Method: POST
            Endpoint: https://class1.meritgraph.com/v1/{CLIENT_ID}/{Class_ID}/users
            Content Type: application/json
            Header: "Authorization": Bearer {AccessToken}

            Request Body:
            {
                "users": [
                    {
                        "userId": "user_Id_1",
                        "userLink" : "bb.NpgS0KgwUw8hBb0sP3ZyCPAKKhcQz_H3V197J0IGXZAQ6WmqNxUdi5a407Ng",
                        "userType": "su"
                    },
                    {
                        "userId": "user_Id_2",
                        "userLink" : "bb.NpgS0KgwUw8hBb0sP3ZyCPAKKhcQz_H3V197J0IGXZAQ6WmqNxUdi5a407Ng",
                        "userType": "su"
                    }
                ]
            }
            [
                {
                    "userId": "user_Id_1",
                    "userLink":  "CPAKKhcQz_Hbb.NpgS0KgwUw8hBb0sP3Zy3V197J0IGXZAQ6WmqNxUdi5a407Ng"
                },
                {
                    "userId": "user_Id_2",
                    "userLink":  "CPAKKhcQz_Hbb.NpgS0KgwUw8hBb0sP3Zy3V197J0IGXZAQ6WmqNxUdi5a407Ng"
                }
            ]
Remove users from class
This will remove the user from class. You have to send an array of userIds of those users who you want to remove from the class.
Delete class
This will delete all the data of the class. It includes the deletion of participants, attendance, recordings data of the class.
Webhook to ping status of classes, recording, and attendance
This is your url. You need to receive POST pings on it. Please update this url in MeritHub.
Go to Admin Console -> API -> Update Status ping url and save the information.
You will receive the following data at status ping url for different objects, please dump it in txt file, so you notice what all status pings are coming to your server. Decide the pings that you want to save and then save them in your database.
Status of classes
- Live: lv
- Ended: cp
- Cancelled: cl
- Expired: ex
- Edited: up
        {
            "networkId: "network_Id",
            "requestType": "classStatus",
            "startTime": "2021-04-16T13:14:48",
            "timeZoneId": "Asia/Kolkata",
            "classId": "class_Id",
            "status": "lv",
            "subClassId":"subClassId"
        }
When class has ended and attendance has been generated
        {
            "classId": "class_Id",
            "networkId": "network_Id",
            "requestType": "attendance",
            "subClassId": "Subclass___ID",
            "attendance": [
              {
                "analytics": {
                  "audio": 0,
                  "chat": 0,
                  "content": 0,
                  "questionAsked": 0,
                  "quiz": {
                    "attempted": 0,
                    "correct": 0,
                    "wrong": 0
                  },
                  "raisedHand": 0,
                  "reaction": 0,
                  "reconnect": 2,
                  "whiteboard": 3
                },
                "browser": {
                  "name": "Chrome",
                  "version": "105.000"
                },
                "endTime": "2022-10-16T17:57:04Z",
                "ip": "ip_address",
                "os": {
                  "name": "Linux",
                  "version": "0"
                },
                "role": "host",
                "startTime": "2022-10-16T17:53:00Z",
                "totalTime": 244,
                "userId": "user_Id_1",
                "userType": "mu"
              }
            ]
          }
When recording is available
        {
            "networkId": "networkId",
            "classId": "classId",
            "subClassId": "subClassId",
            "requestType": "recording",
            "status": "recorded",
            "startTime": "2021-04-16T13:14:48",
            "duration": "0:00",
            "url":"player_url"
        }
Files that host shared on whiteboard from drive
        {
            "networkId": "networkId",
            "classId": "classId",
            "requestType": "classFiles",
            "Files":[
                {
                    "networkId": "file networkId",
                    "subClassId": "file subClassId",
                    "userId": "file userId",
                    "type": "file_type",
                    "title": "file_title",
                    "fileId": "fileId",
                    "url":"file_url"
                }
            ]
        }
When class has ended and chat has been generated
        {
            "networkId": "networkId",
            "classId": "classId",
            "subClassId": "subClassId",
            "requestType": "chats",
            "chats": {
                "public":"chat_json_link",
                "private":[array_of_chat_json_links]
            }
        }